
OBS Studio (Open Broadcaster Software) is a video recording program that allows you to make tutorials, record your PC screen, make webinars, but most important, allows you go live stream on several platforms such as Youtube, Twitch…, and Wavezoo.
If you’re new to streaming on Wavezoo, this guide will walk you through the steps to set up OBS for a seamless streaming experience.
How to setup the OBS settings for Wavezoo
First and foremost, it’s essential to assess your internet connection and hardware capabilities. The available video quality options in OBS, such as 720p, 1080p, or even higher resolutions, demand sufficient upload bandwidth. A stable and fast internet connection is vital to prevent buffering and maintain a consistent stream.
OBS offers a range of video quality options, each with its own set of considerations. Making the right choice ensures a seamless and enjoyable streaming experience for both content creators and their audience.
Navigating the Video settings allows you to configure these parameters. Experiment with different combinations to find the sweet spot that aligns with your setup and content type.
1. Select the resolution that aligns with your preferences:
| Quality Stream | Video Bitrate | Audio Bitrate | Resolution | FPS |
|---|---|---|---|---|
| 2160p (UHD) | 14,000 Kbps | 192 Kbps | 3840×2160 | 30 |
| 1080p (FHD) | 4,500 Kbps | 192 Kbps | 1920×1080 | 30 |
| 720p (HD) | 3,072 Kbps | 192 Kbps | 1280×720 | 30 |
| 480p | 1,500 Kbps | 192 Kbps | 854×480 | 30 |
2. In case of performance issues, consider reducing the bitrate until a smoother flow is achieved.
Balancing video quality with bit rate settings is a critical aspect. Higher quality requires a higher bit rate, but it’s crucial to find a balance that aligns with your internet upload speed. A bit rate that is too high for your connection may lead to dropped frames or stream interruptions.
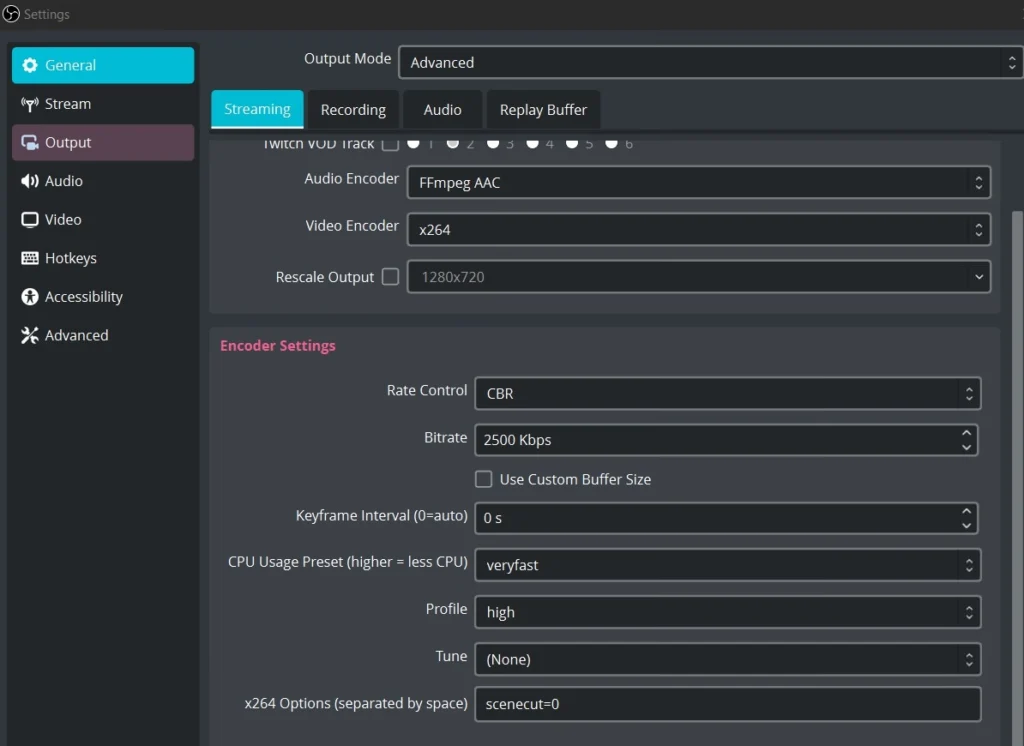
OBS Streaming Settings for Wavezoo
Here’s a concise guide to the key settings supported:
- Audio Encoder: AAC
- Video Encoder: x264
- Bitrate: depends on your hardware and internet connection (check the table above).
- Keyframe Interval: 2s
- Profile: High
- Tune: avoid using “zerolatency”, which harms rather than reduces latency.
- x264 options: scenecut=0
If the recommended values cause problems because the bandwidth is not enough or the machine is not powerful enough, both video and audio bitrate can be lowered until a suitable configuration is found (bandwidth is more influenced by audio bitrate, although it may seem counter-intuitive).
Always test your stream before going live to ensure that the selected video quality settings provide a smooth viewing experience.